Gem-based method Setup
Minimal Mistakes has been developed as a Gem-based theme for easier use, and 100% compatible with GitHub Pages when used as a remote theme.
참고 블로그
Installation-Window (default)
Jekyll is a Ruby gem. First, install Ruby on your machine.
Ruby Installation
The easiest way to install Ruby and Jekyll is by using the RubyInstaller for Windows.
RubyInstaller is a self-contained Windows-based installer that includes the Ruby language, an execution environment, important documentation, and more.
-
Download and install a Ruby+Devkit version from RubyInstaller Downloads.
e.g. rubyinstaller-devkit 2.7.x(x86)
여기서 가장 중요한 것은 Jekyll은 32bit이기에, 설치시 (x64)가 아닌 (x86)으로 진행해야합니다. 이는 초기 설정시 제일 빈번하게 발생하는 세팅 오류이기 때문에, 꼭 신경써서 설치해주셔야 합니다.
-
Use default options for installation. Keep clicking
Next -
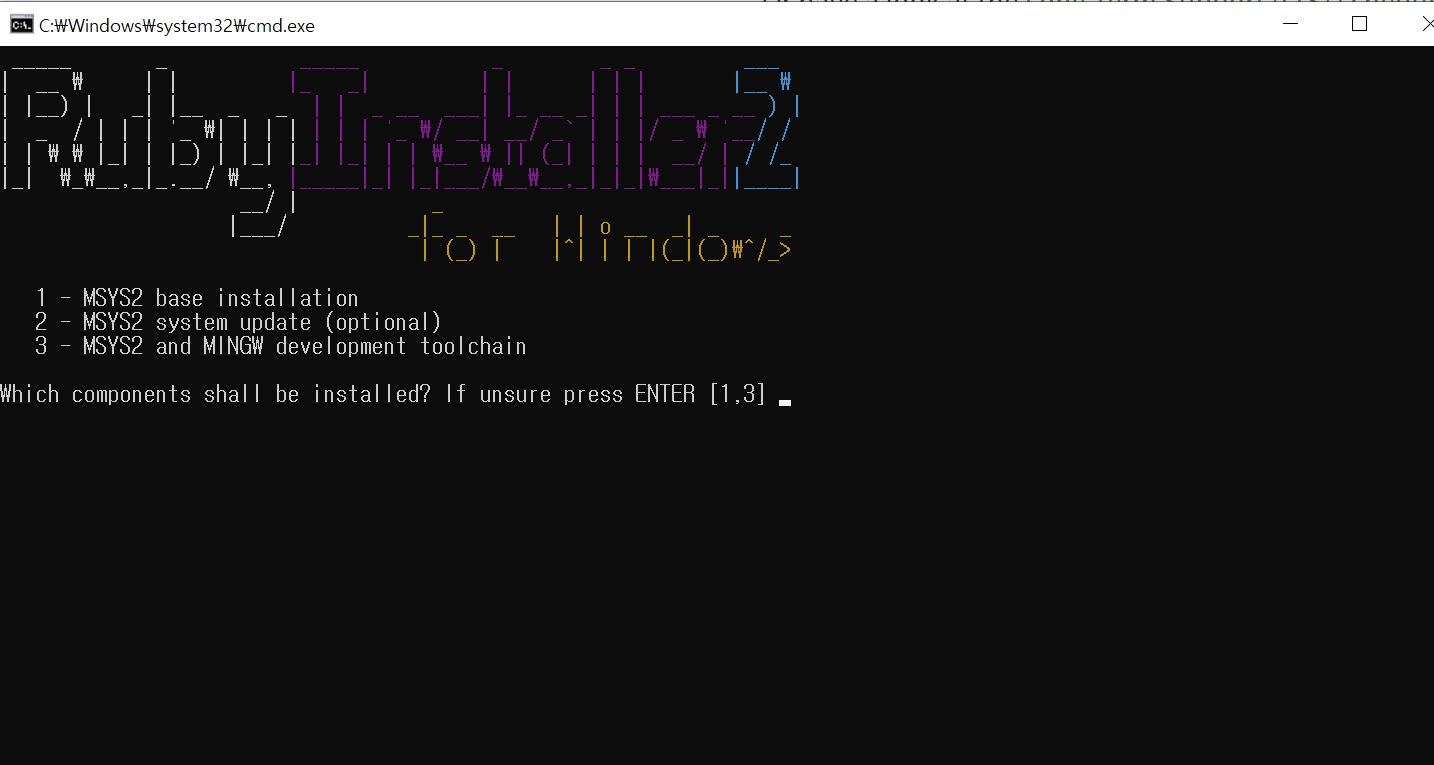
Select (1) MSYS2 Base and (3) MSYS2 and MINGW installation: Type 1,3 as instructed. This is needed for installing gems with native extensions. You can find additional information regarding this in the RubyInstaller Documentation
- Open a new commandprompt(adminstration mode) from the start menu. The
PATHenvironment variable becomes effective.
NodeJS (8 or greater) / Gulp
Download and open the NodeJS installer
Install with default setting.
It will also install ‘Chocolatey’ on the local machine. It is similar to package manager of apt-get for window programs.
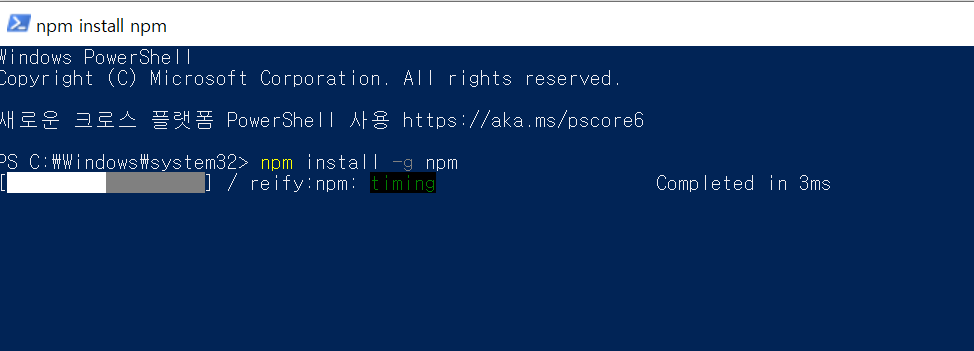
Open a new command prompt(administration) window, and update npm by
npm install -g npm

npm install -g --production windows-build-tools
(optional) Install Gulp CLI
npm install --global gulp-cli
Jekyll Installation
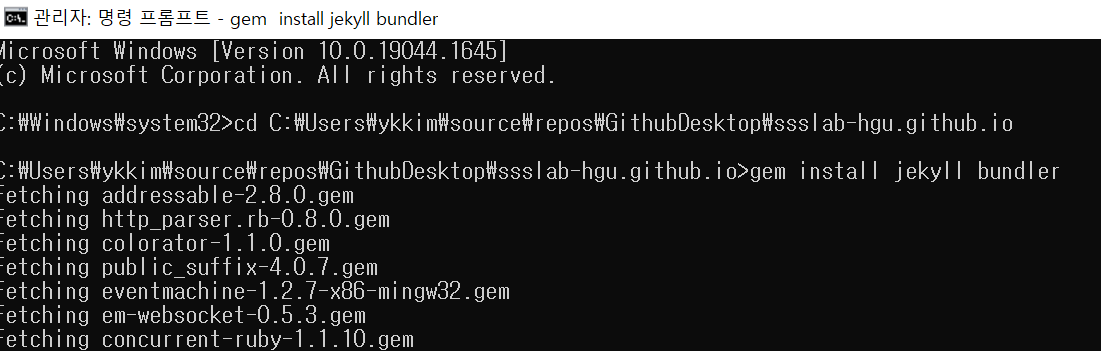
Go to the directory where repository for github blog is installed.
Open a CMD window.
With Ruby installed, install Jekyll from the terminal:
gem install jekyll bundler
Check if Jekyll has been installed properly: jekyll -v
rake를 찾을 수 없다고 뜨는 경우
gem install rake를 이용해 받아주도록 합니다.
Jekyll이 잘 안되는 경우는 호환성 문제인 것 같은데, 이 때는 gem을 다운그레이드 하는 것도 해결책이 될 수도 있다고 합니다. 명령어
gem update --system 2.5.0을 실행
#
If Installation process is already done, go to Running Local Server
Installing the theme
If you’re running Jekyll v3.7+ and self-hosting you can quickly install the theme as a Ruby gem.
ProTip: Be sure to remove /docs and /test if you forked Minimal Mistakes. These folders contain documentation and test pages for the theme and you probably don’t want them littering up your repo.
Note: The theme uses the jekyll-include-cache plugin which will need to be installed in your Gemfile and added to the plugins array of _config.yml. Otherwise you’ll throw Unknown tag 'include_cached' errors at build.
Gem-based method
With Gem-based themes, directories such as the assets, _layouts, _includes, and _sass are stored in the theme’s gem, hidden from your immediate view. This allows for easier installation and updating as you don’t have to manage any of the theme files.
To install as a Gem-based theme:
-
Modify the following to your
Gemfile:source "https://rubygems.org" #gemspec gem "jekyll", "~> 3.7" gem "kramdown-parser-gfm" gem "minimal-mistakes-jekyll" -
Fetch and update bundled gems by running the following Bundler command:
bundle // bundle install -
In the same directory, Install npm
npm install -
For GITHUB Page, comment theme in your project’s Jekyll
_config.ymlfile:# theme: minimal-mistakes-jekyll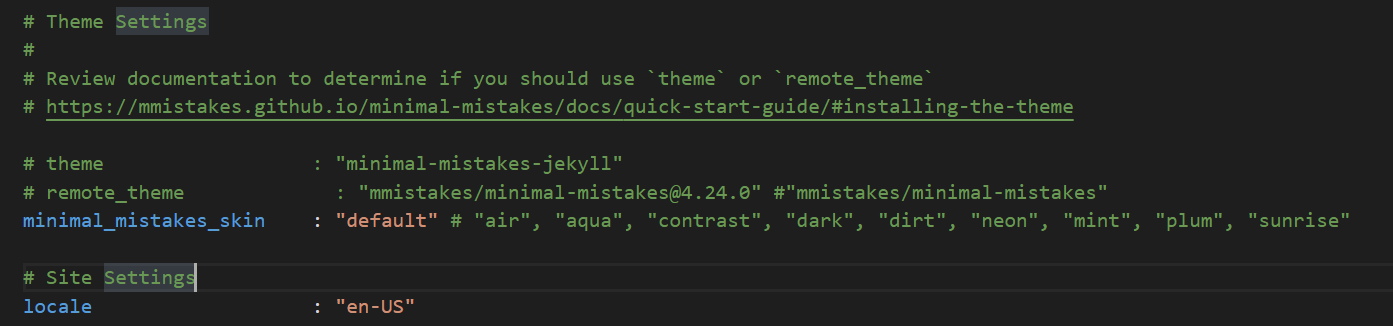
-
Add
jekyll-include-cacheto thepluginsarray of your_config.yml.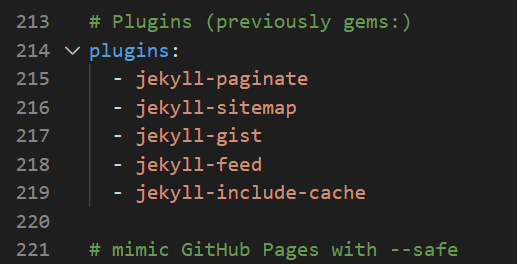
-
To update the theme run in CMD
bundle update -
Run the server
bundle exec jekyll serve -
Check the site in the local host: http://localhost:4000/
Running Local Server
- Modify contents
-
Execute in CMD (under the website file directory):
bundle -
Run the server
bundle exec jekyll serve - Check the site in the local host: http://localhost:4000/
불필요한 폴더 제거
If you forked or downloaded the minimal-mistakes-jekyll repo you can safely remove the following folders and files:
.editorconfig.gitattributes.github/docs/testCHANGELOG.mdminimal-mistakes-jekyll.gemspecREADME.mdscreenshot-layouts.pngscreenshot.png

docs 내부의 _pages 폴더는 추후 상단의 카테고리를 선택할 수 있는 양식이라, 참고용으로 사용하면 됩니다.
docs 내부의 _post, _docs 등도 메인 디렉토리에 복사해서 유용하게 사용할 수 있음

Website Editing
Style Modification
Also read:
-
https://inhyeokyoo.github.io/github%20pages/tips-for-minimal-mistakes/
-
https://www.fabriziomusacchio.com/blog/2021-08-11-Minimal_Mistakes_Cheat_Sheet/
You can modify the theme by changing the settings in _config.yml of Root Directory
Note: for technical reasons, _config.yml is NOT reloaded automatically when used with jekyll serve. If you make any changes to this file, please restart the server process for them to be applied.
For a full explanation of every setting be sure to read the Configuration section.
v4 Breaking Change: Paths for image headers, overlays, teasers, galleries, and feature rows have changed and now require a full path. Instead of just image: filename.jpg you’ll need to use the full path eg: image: /assets/images/filename.jpg.
Title, 스타일 변경하기
- 수정 파일 : github.io 폴더 > _config.yml
site settings 내용 변경: 타이틀, url
Font size 변경하기
Method 1: _resec.scss
- 수정 파일 : github.io 폴더 > _sass 폴더 > _minimal-mistakes 폴더 > _reset.scss
html {
  /* apply a natural box layout model to all elements */
  box-sizing: border-box;
  background-color: $background-color;
  font-size: 16px;                    // Default 16px;

  @include breakpoint($medium) {
    font-size: 16px;                  // Default 18px;
  }

  @include breakpoint($large) {
    font-size: 16px;                  // Default 20px;
  }

  @include breakpoint($x-large) {
    font-size: 16px;                  // Default 22px;
  }

  -webkit-text-size-adjust: 100%;
  -ms-text-size-adjust: 100%;
}
Method 2: _resec.scss
/[assets]/[css]/main.scss
폰트 사이즈만 오버라이딩하는 방법임.
---
# Only the main Sass file needs front matter (the dashes are enough)
---

@charset "utf-8";

@import "minimal-mistakes/skins/default"; // skin
@import "minimal-mistakes"; // main partials

html {
    font-size: 16px; // change to whatever
    @include breakpoint($medium) {
      font-size: 18px; // change to whatever
    }

    @include breakpoint($large) {
      font-size: 18px; // change to whatever
    }

    @include breakpoint($x-large) {
      font-size: 18px; // change to whatever
    }
}
TOC 폰트 사이즈 수정
TOC 폰트 사이즈는 자동적으로 page width에 따라 가변되도록 설정되어 있다. _sass\minimal-mistakes\_navigation.scss 파일에서 확인
H1~H4의 사이즈는 _sass\minimal-mistakes\_variables.scss에서 설정 가능.
/* headline scale */
$h-size-1: 2.7em !default; // ~25.008px
$h-size-2: 2.0em !default; // ~20px
$h-size-3: 1.75em !default; // ~18px
$h-size-4: 1.5em !default; // ~17px
//$h-size-1: 1.563em !default; // ~25.008px
//$h-size-2: 1.25em !default; // ~20px
//$h-size-3: 1.125em !default; // ~18px
//$h-size-4: 1.0625em !default; // ~17px
$h-size-5: 1.03125em !default; // ~16.5px
$h-size-6: 1em !default; // ~16px
Main index 변경하기
메인 디렉토리에 index.md 생성
예시:
---
layout: single  #splash
author_profile: true
title: Welcome to SSS LAB
---
레이아웃 테마를 splash 혹은 single로 선택
좋은 예시로 docs/home.md 를 참고하면 됨.
Nav Side Bar 변경하기
- 수정 파일 : github.io 폴더 > _data 폴더 > navigation.yml
Page width 조정하기
헤더에 다음과 같이 추가
classes: wide
예시
title: Research
permalink: /research/
classes: wide
That’s it! If all goes well running bundle exec jekyll serve should spin-up your site.
Troubleshooting
1. Successful in Local Server but Build Error in Github Page
” theme” cannot be found error in Github build
Solution
For GITHUB Page, comment theme in your project’s Jekyll _config.yml file: